Once you place your order, you will be sent a link to retreive the instructions for your ornament(s). Having them electronically will provide you with the opportunity to print the instructions, view them online while you are putting your ornament together, and expand the view so you can see the instructions/pictures better. The photos will look so much better in electronic format than they do in printed format. If you are looking for good clarity; digital is the way to go! In addition, the digital version is free with the purchase of the ornament. If you want your directions in printed form, they are available for a small fee plus postage. Please email us if you would like to order a printed copy. Our cost to print and include the directions in the kit is more costly for you than your cost will be to print the directions from the digital delivery. Try this new way of receiving your directions. We think you will really like the clarity of the print and pictures.
_______________________________________________________
For your reference, please take some time to read a section of the instructions for Sa Majesté de Paris so you can see what you are getting yourself into.
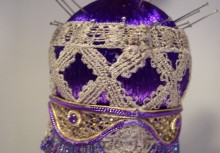
“gain a little more lace until the area at that cut little line at the top, bottom edge and the arms of the X’s would make a perfect match. Yes it takes some adjusting more than one time, but then all of the sudden, there it is, and you are inserting “hold it” pins so the X’s don’t move. Please be sure to look at each X and each diamond shape and make sure they all look as much alike as is possible.
I thought you may like to have a few giggles and laughs at how my practice ball looked at this stage of the game. I told you the jointure was not pretty!
THE GRAND COVER-UP!
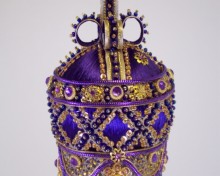
Look at the picture on page 4 to get a sneak peak at what this step will look like when finished. The picture on page 4 is so much better than the above picture.
From your stash of supplies, take out four of the 10mm gold bell caps. Yes, they are domed and you do not want them to be domed. On top of your napkin pad from before place one bell cap domed side up. With your nail punch in the center of the dome push down on the center and it will collapse. Do that collapse technique to the other 3 bell caps also. Pick up a gold 3/4 inch pin and insert it into the center hole of one of these bell caps. At the splice in the lace at the one purple/2 gold cord line and the one purple/one gold cord line, center the collapsed cap over the splice and push the gold pin straight into the ball. That covers up that problem! But, it creates a design problem. We solve the design problem by strategically placing one of the three other smashed caps on the two gold/1 purple cord line and one purple/one gold cord line at the spot where the top of the wave line below touches. Ah ha! Problem solved!
I lied! You need to retrieve the 3mm amethyst rhinestones. Glue a 3mm stone onto each pin head area of these 4 smashed and pinned on bell caps, set the glue. Be VERY careful you do not dislodge any of these or any of your other stones in any of the following steps.
When YOU are very satisfied that the circle of lace is properly fitted at the top edge touching the pins and that the legs of the X at the “seam” are correct, it is time to move on to more mundane tasks.
GOLD SEQUIN, GOLD BEAD, GOLD PIN SPARKLE
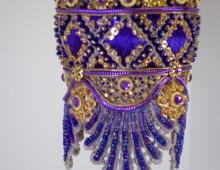
Now we have you where the work is easier! Focus on the X design area. It is hard to miss the thin thread loops that surround a diamond shape and a half diamond shape on the inner side of the X legs. These are the loops that will get the treatment now. You will have to adjust the loop slightly now and then to keep them in half circle shape yet you will probably not see much of the thread after you add on a 1/2inch gold pin add a small glass gold bead and a 2mm gold sequin and this combination in each loop please. Yes, the whole way around the ball. Get the picture? Here is one for you!
Go to work! Come back here when you have finished attaching all of these combos in the loops. I will work on another task for you to do well.
Back so soon? How fantastic! I am glad you returned. I have more bead, pin, and sequin combination work for you to start and finish.
GOLD PIN, PURPLE BEAD, PURPLE SEQUIN
Let’s examine the X’s on your ball. Each X has two, or three, arms depending upon how you perceive what you are looking at when you are looking at the X. One arm of the X is a continuous strip. Completing the X is another arm that appears to be divided in half because the upper other arm crosses over or on top. I would like for you to work with the two part arms first simply because doing so creates the least confusion.
You will be working with and using many gold pin (short or long), larger iridescent purple bead and a 2mm purple sequin. Pick up a pin, add on the bead and sequin and begin on a short arm using four of these combos in each short arm. Yes, the sequins will overlap one another. Good observation! It is four more of these combos in the other half of the arm of this X now. Want to shake it up a little bit? Sure, you can do it! You can now put nine of this same combo centered and stuck into the one long continuous arm of this X. You guessed it; you can put one in the center of the strip and four on either side of that one all in a straight line! Got the picture? I’ll include one anyway, just in case. I really like that purple triangle and diamond shaped area in the lace. I hope you do too.
Please complete the rest of the X’s that are empty and void of this combo.”


